I don't suppose you have noticed it is almost the end of the year? I must be aging, because time seems to go faster and faster. What a gift time is. I don't fully appreciate that gift like I should. I am ending the year on a rather somber note. A very lovely lady went home to Heaven on Christmas Day, and we are traveling to attend her memorial service. She left behind three young boys, and a loving husband. That seems like an awfully bad mistake for a loving God to make...or does it? Death, pain, and disease were brought into the world because of man's choice, not God's. (Genesis 1-3) God's love is what offers us hope from all these awful things. (Romans 5:8) We have the choice, accept Him, or reject Him. Our friend is in Heaven today, because she chose to accept Him, and that is what comforts those left behind. Our lives are one DIY project that we will never ever be able to fix up ourselves. I would be a very bad blogger indeed if I told you how to refinish a chair or sew a shirt, but never shared what can change your heart forever. Inviting Jesus Christ into your life is a choice you will never regret. Life is a gift, but it isn't guaranteed.
Thank you for "hanging out" with me this whole last year! I've had such fun with this blog, and can't wait for all the new projects ahead. I hope you and your families have a wonderful and happy new year!

Thursday, December 29, 2011
Tuesday, December 27, 2011
Drawstring Bag Tutorial

Well hello! How was your Christmas? Mine was wonderful, and perfect in every way. I've come down with a nasty cold since though, and lost my voice completely. My toddler thinks I'm whispering because I want her to play quietly, and keeps whispering back to me. Haha! I should have tried this ages ago, what a wonderful tactic! Anyway, I sewed myself a new diaper bag while I was on my Christmas bloggy break, and put together a few extra for my shop. They are great little bags, that can be used for a beach bag, diaper bag or whatever you want.

Changing up the fabric can change it to fit whatever use you want.

Each bag has four inner pockets to keep things nice and tidy.

I used nylon strap to make a handle and a strap down the back, for over the shoulder carrying.

I used heavy weight fabric for both the liner and outside, because I wanted them to very durable. You'll need 2 yards total of fabric. If you use regular cotton, I would put some stiffener or something in between to help it hold up better. I used nylon strap for the handle and back strap, and cotton cording for the drawstring.
You need to cut out the following pieces, one of both the lining and the shell.
Bag body - 29" x 14"
Bag bottom - 9" circle (I used a pie pan as my pattern)
Pockets- 29" x 8" ( this can be either of the fabrics or both)
Start with the pockets. Put the two strips right sides together and sew along the top.

Flip the right sides out, and then top stitch along where you just sewed.

Lay it on top of the bag liner. Find the center and pin a straight line.

Measure over 7 1/2 inches and pin another line.

Do the same to the left of the center line. You should have three pinned lines, making four pockets.

Sew down each pinned line.

Fold the lining right sides together, and sew down the side.

Hold the bag lining open at the base.

Set the lining circle into the bottom and sew on. I would highly recommend pining it in place first. I was on my sixth bag at this point, so I was feeling rather confident in my mad sewing skills and skipped pinning.

Once the bottom is sewn on, flip it right side out. Make sure you have caught all the pocket layers around the bottom, and that everything is sewn securely.

Take the outside piece of the bag, and find the center. Mark where you want the button holes to be for your drawstring, and sew them in. ( you can also use grommets if you don't want to do button holes)

Fold it over and sew up the side, just as you did with the liner. Cut a strap the length of your bag plus a an inch or so.

Sew on the bottom circle, just as you did with the liner. Make sure to sandwich the strap in between as you sew.

OK, almost done! Stuff the outer shell into the liner, making sure both right sides are together.

Cut an 8 inch piece of strap for your handle. You want it to be sewn on like this.

Pin it on accordingly, sandwiched between your outer shell and liner.

Pin around the top, but remember, you'll need to leave a space open to turn it. I usually double pin where I don't want to sew.

Sew around the top. Turn the bag right sides out through the hole you left open. It should look like this.

Top stitch around the top, closing up the hole as you go. Now, you need to sew another line about an eighth of an inch beneath that all the way around. Sew another line about an inch and a half beneath that one. This is where the drawstring will go.

Thread your drawstring through the bag. If you use cording like I did, I found it was easiest to tape off the end of the cord. Stick a safety pin through the tape and then thread it through.

All done! I know that that's a super long explanation, but it really is a simple bag to make!

I hope this all makes sense, let me know if you have any questions!

Thanks for reading and happy sewing!
Isaiah 42:16 And I will bring the blind by a way that they knew not; I will lead them in paths that they have not known: I will make darkness light before them, and crooked things straight. These things will I do unto them, and not forsake them.
Linking to:
Someday Crafts
My Girlish Whims
Sew Much Ado
Its Overflowing
Free Pretty Things For You
Sew Woodsy
Tuesday, December 20, 2011
Christmas trees for your Christmas tree!
I finally finished my Christmas tree! Nothing like being on the ball and on top of things! Ha! I'm so glad I finished too, just in time for half the lights to stop working. Awesome. Well anyway, if you are a chronic blog browser like me, you know the web is just oozing with gorgeous Christmas inspiration right now. I could sit for hours and just look through all the creative talent that is out there. I stumbled across this tutorial, the other day. These little trees are made from cut up jeans, and they are just too cute!
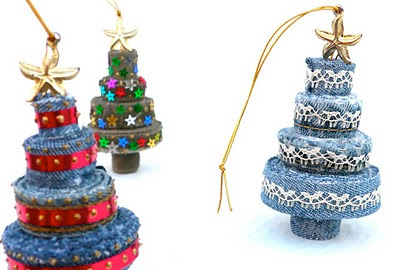
It just so happened, that I have a whole bag of cut up jeans! Why you ask? I'd rather you didn't. I don't remember, but it was for something good I'm sure of it! (totally in denial about any fabric hoarding obsessions going on here!) I used some to make a few little trees of my own.
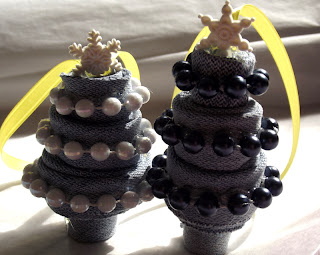
I swiped a few of the thirty three million little girl necklaces my two year old has, and hot glued them on for my bling.

Go check out that tutorial and make yourself one!

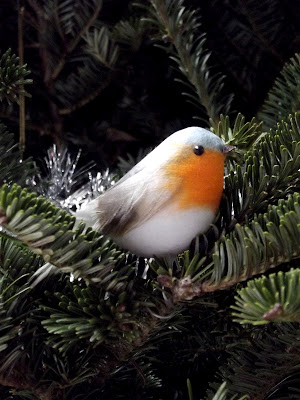
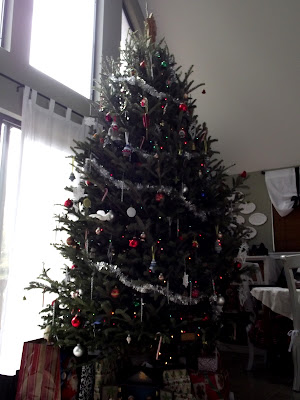
So wanna see my tree? First off, its not a "put together, everything matches, designer" type tree. Its a hodge podge, messy sort of tree with lots of good memories attached. Every year we get each other a new ornament. My mister usually gets a bird too. I love them perched here and there in the branches.


It just so happened, that I have a whole bag of cut up jeans! Why you ask? I'd rather you didn't. I don't remember, but it was for something good I'm sure of it! (totally in denial about any fabric hoarding obsessions going on here!) I used some to make a few little trees of my own.

I swiped a few of the thirty three million little girl necklaces my two year old has, and hot glued them on for my bling.

Go check out that tutorial and make yourself one!

So wanna see my tree? First off, its not a "put together, everything matches, designer" type tree. Its a hodge podge, messy sort of tree with lots of good memories attached. Every year we get each other a new ornament. My mister usually gets a bird too. I love them perched here and there in the branches.


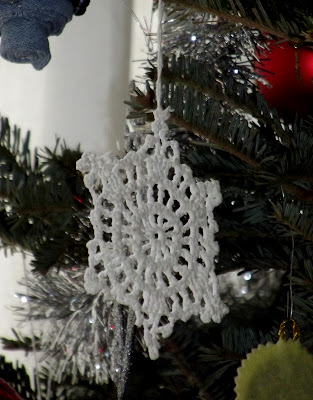
Some were given to us, or hand made by other people.

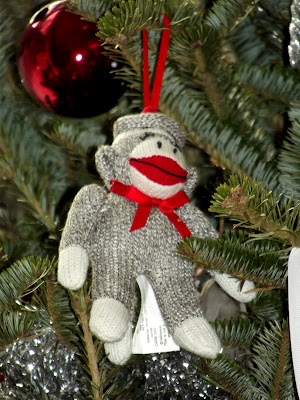
Some have so much sentimental value, like this little sock monkey. My mister was deployed one year during Christmas time, and had hid it before he left for me to find on Christmas. It sat out on my desk for months and smiled at me, reminding me to keep my chin up when I certainly didn't feel like it.

I always put just regular old candy canes on it too...something so classically Christmas about them.

So, here is my tree, all put together in time for Christmas.

Its ginormous is it not? It's ten feet tall and about 6 feet wide. The wide part is the problem. My house has a nice high roof, only a little square footage. In my little house, this thing takes up half the dining room and half the living room. But hey, at least its festive looking! What does it matter if you practically have to walk sideways to get around and pine needles fall into your dinner plate?!
I believe I'll take the rest of the week off to just enjoy Christmas with my kiddos. I think I hear some Christmas baking calling my name! (does making hot chocolate in the microwave count as baking? let's not get too carried away here!)
I hope you will take some time in all the merry making to think about the greatest Gift that was given to all of us, Jesus Christ. Let's not forget why we are celebrating in the first place!
MERRY CHRISTMAS!!
Isaiah 9:6 For unto us a child is born, unto us a son is given: and the government shall be upon his shoulder: and his name shall be called Wonderful, Counsellor, The mighty God, The everlasting Father, The Prince of Peace.
Monday, December 19, 2011
Sewing tip - Sheer Fabric
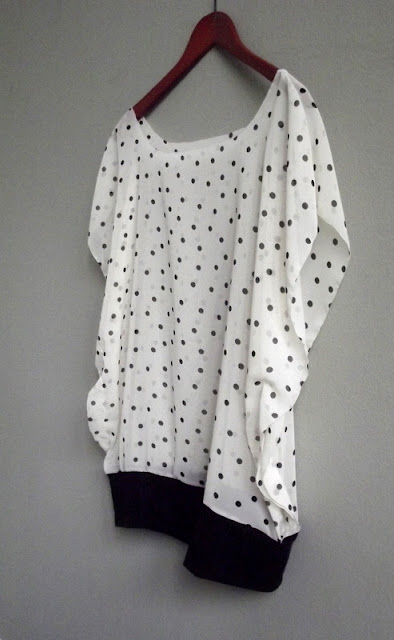
I'm interrupting the obligatory Christmas related posts to give you a quick sewing tip. You're due for one you know, its been like a month! So here it is, recently I made a few things out of sheer fabric for my Etsy shop. Sheer fabric is very pretty, but can be quite the headache to sew! It tends to pucker and snag, and it can be tricky to get seams to lay flat. Hemming it is even worse! My solution...burn it!
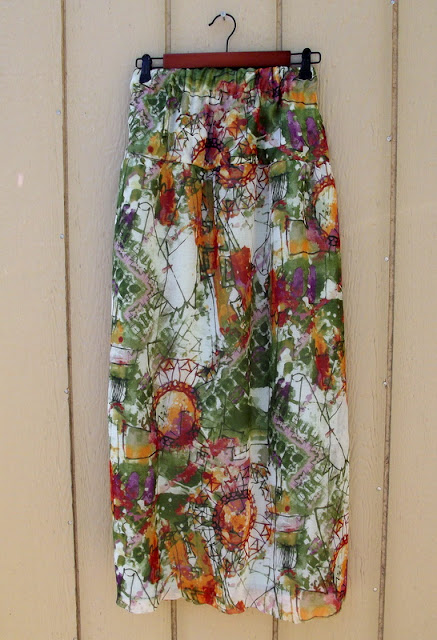
No really! If your fabric is 100% polyester, you can take a lighter and very CAREFULLY melt the edges. This keeps it from fraying and preserves the airiness of the fabric. No puckers and no seams to interrupt the visual flow of the fabric. On light colors, you need to be very careful not to burn the fabric, because it will show. You want to melt it only!
Disclaimer: I cannot be held responsible for burnt appendages, incinerated garments, and or damaged goods of any kind! =)
By the way, did you know it is only five more days 'till Christmas??!! Agh! To all distant family and friends, I'm going to the post office today, I promise!
2 Samuel 22:31 As for God, his way is perfect; the word of the LORD is tried: he is a buckler to all them that trust in him.

No really! If your fabric is 100% polyester, you can take a lighter and very CAREFULLY melt the edges. This keeps it from fraying and preserves the airiness of the fabric. No puckers and no seams to interrupt the visual flow of the fabric. On light colors, you need to be very careful not to burn the fabric, because it will show. You want to melt it only!

Disclaimer: I cannot be held responsible for burnt appendages, incinerated garments, and or damaged goods of any kind! =)
By the way, did you know it is only five more days 'till Christmas??!! Agh! To all distant family and friends, I'm going to the post office today, I promise!
2 Samuel 22:31 As for God, his way is perfect; the word of the LORD is tried: he is a buckler to all them that trust in him.
Thursday, December 15, 2011
Dog vs. Goose

Good thing goose has wings!
You looked like you needed a smile today. You're welcome. =)
Luke 6:38 Give, and it shall be given unto you; good measure, pressed down, and shaken together, and running over, shall men give into your bosom. For with the same measure that ye mete withal it shall be measured to you again.
Tuesday, December 13, 2011
Wire Star Ornaments
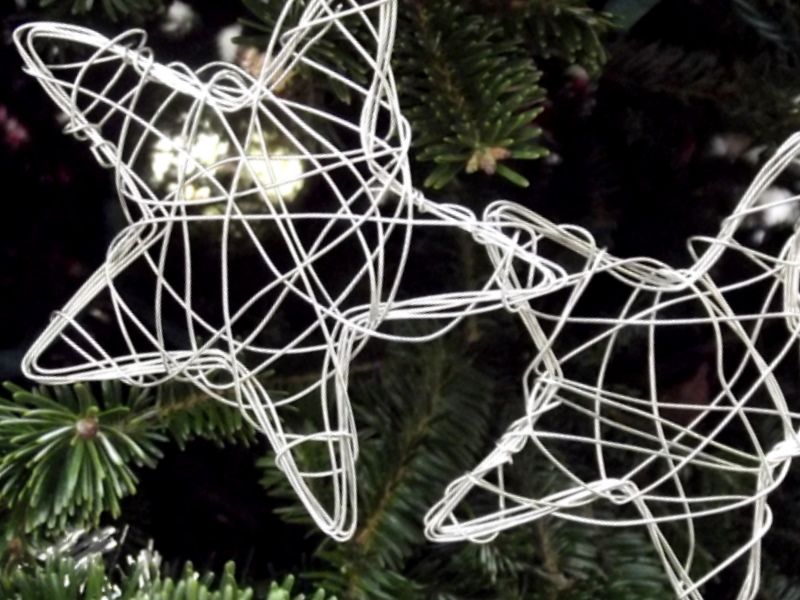
These cute little stars aren't my brain child. I found a tutorial for these a couple years ago, but I can't find it for the life of me! I liked the rustic vibe these have, and they are so simple to make. You need wire, wire cutters, nails, and a block of wood.

As you can see, the block of wood is what you use to shape the wire. Trace a star onto it, and then hammer nails partially into the wood at the points of the star. You want them to splay outwards just slightly.

You'll need to strips of wire about five feet long each. Take one of the strips and make a loop in the middle of the piece.

Hook it on the outside of one of the nails.

Start winding the wire in and out of the nails. Make sure you go on the inside of the inside nails, and outside of the outside nails.

Do one half of the wire to the right, and then the other half of the wire to the left. When you finish it looks like this.

Carefully take the star form off the nails, make sure not to let go or it will all spring apart! Wrap the ends around to secure the form.

Twist on the second piece of wire and start winding it around the star form.

When you are finished, make sure the ends are all tightly wound around the form to keep it from unraveling. Tie some ribbon in the loop, and you are all done!

You can leave it puffy or smash it flat. I used the highly complex method of stepping on it to flatten it. It worked fabulously! The one on the right is the flat one.

Of course, this is just the basic method...you could always jazz them up with spray paint! I refrained, but may need to try that next.

Merry almost Christmas! =)
Psalms 147:4 He telleth the number of the stars; he calleth them all by their names.
Subscribe to:
Posts (Atom)