Monday, January 30, 2012

Quick and simple wall art

     Happy Monday! Mondays are my least favorite day, so I'm just going to pretend it's a happy day. I made some super simple wall art, the other day, to add to my wall of white. It all started when I saw this picture on the Pottery Barn website.


         I thought the simplistic white on white was lovely. A $100 for it though...mmm not so lovely. Thankfully, I had just the thing to make my own. I had a cupboard door left over from this project and, I picked up some wooden letters from Walmart.


      I glued on the letters, painted the whole thing black, painted it white, and distressed it.


      For it costing me less than $5, I'm pretty satisfied. I also grabbed a cheap canvas. and painted some numbers on it for another piece of easy "art".


       My wall still has plenty of room for more, but I like adding things here and there as I get ideas.


       Have a grand week and don't forget to have a little "joy" today! =)

Psalms 51:8 Make me to hear joy and gladness;

linking to:
Kammys Korner
Pin It

Friday, January 27, 2012

Friday Favorites

        So, how was your week? I have a sad, little sick baby today. I hate when babies get sick. They try so hard to be happy, but you know they feel really bad. I also have a toddler splashing in mud outside the front door....so I'm going to make this snappy, before things get out of hand out there.
       My favorites this week are all projects I want to try. The skirt on this dress is just darling. Both me and my girls definitely need one for summer. Maybe a white one?


       This might be the most brilliant idea I've ever seen. I am doing this the first opportunity I have to escape to town. Its a rug people!...and its gorgeous!


       I saw this little coat via Pinterest. I think its so sweet looking. My girls don't need more jackets, but I was thinking of trying to copy it as a dress instead. Maybe a Valentine's Day dress?


       I hope you all have a lovely weekend and thanks for stopping in! =)

Psalms 86:15 But thou, O Lord, art a God full of compassion, and gracious, long suffering, and plenteous in mercy and truth.


Pin It

Wednesday, January 25, 2012

Batwing Top Tutorial

      Isn't that such a great name?..."batwing"...whoever thought of that was a winner. Anyway, despite its rather dubious name, this style shirt is so comfy and you will love it.

 
       Oh, did you notice I got the picture from Pinterest? Yes, I've fallen to the peer pressure...from my big sister. Thanks a lot sister dear, I hold you personally responsible for any and all consequences of this new addiction.  Now, what were we talking about? Oh yes, batwing shirts. Well, here is mine.


      Yup, I took the picture in my bathroom mirror. It was raining outside. Don't judge. Want to make one? Here's how. I'm going to rely on some awful drawings because black fabric is hard to see in pictures. Situate your fabric so it is folded length wise and then folded in half. This will give you four layers of fabric with two folds on the long side and one thick fold on one short side.
      Now then, take how wide you are divided by four. Mark that against the folded edges. Make it as long as you want the shirt.
      OK, decide how long you want the sleeve to be. I made mine 9 inches long. I planned to add a 4 inch cuff so that it would be a half sleeve. Also, measure how big around your arm is at that point. I wanted mine to be fitted, but not tight. My sleeve width was 6 inches. Measure these two things out from the line you just drew.
     Next, decide how far up from the bottom of the shirt, you want the sleeve to start. I measured up 9 inches. Draw a line connecting the sleeve to the shirt.
      Now cut that section out. It should look like this.


      Still tracking? OK, you need a cuff for your sleeve. Make as wide as your sleeve and twice as long as you want the end result to be. I made mine 12 inches by 8 inches.

      Now, we need a neck hole in the shirt. Measure 4 inches over and 4 inches down from the top corner.


       Cut that out in a curve. Cut one of the shirt layers a bit lower for the front of your shirt.


      You'll need a neck binding as well. I cut mine 30 inches by 2 inches. Now to sew it all together. Turn it wrong sides out and sew the cuffs on first. Sew down the side and sew on the neck binding. I didn't even hem the bottom of mine. Shhh don't tell! You may need to adjust the waist to be a bit tighter since that is the idea of the shirt. You want the waist to be fitted to compensate for the baggy top.


       That's it for today! Oh yes, before I forget, I placed myself on a blog schedule of sorts. My goal is to post on Mondays and Wednesdays, one sewing project and one "other". Friday's post will be a fun one...randomness that strikes my fancy. As much as I'd love to post every day, its just not practical. So, that's what you can expect to see around here...unless of course "life" happens. In which case, I'll just be happy if I'm showered and dressed.
See you Friday! =)

Psalms 145:8 The LORD is gracious, and full of compassion; slow to anger, and of great mercy.

Linking to:
Sew Much Ado
Sew Woodsy
Someday Crafts
Love Laugh Craft

Monday, January 23, 2012

Fabric, spray paint, and a little imagination - desk makeover

     
      Have you ever had a nice little idea, which led to another idea, which led to another...until the little idea wasn't remotely close to the small idea you started out with? Ya, I do that...a LOT. Its really rather a bad habit...that often leads to some very fun results. I've explained before all about my little work space in this post. It is certainly not glamorous, but I do try to keep it tidy and a pleasant place to work. I needed a desk of some sort for my toddler to use for her own "crafts" while I'm in there working...and it needed to be cute if I had to look at it every day. I started hunting for a little wooden school desk at garage sales and such. I though a little vintage looking desk would be darling. Except one never showed up, much to my infinite sadness. I finally found this at a thrift store.


     It even came complete with pre-applied scribbles.


     I do not like "generic" and I do not like "plastic". But, it was $5. And, it was half off day, so it was actually $2.50. For $2.50, I decided I could surrender my plans and make this ugly thing work somehow. My first plan was just to spray paint the whole thing and be done with it. But, after spray painting the legs, I decided they looked dull.


       I had some scraps that would be just the thing to add a punch of cuteness. So I modpodged them.


      But while that was drying, I got to thinking about how wasteful it would be to pitch the leftover scraps. So, I made her a pencil pouch to match.


      The baby was sleeping uncharacteristically long...and I had more scraps....which led to sewing an art apron. Which, needed a pocket with cute rickrack, of course.


      Girls still sleeping? OK, lets add some decor to her corner!


      And then, thankfully, they both woke up, which saved me from my own madness. Painting the floor under the desk might have been next. So, here's my $2.50 project. Still plastic, but not so generic.


       I'm happy to report, she is very pleased with the new arrangements.


      Let us hope we can contain the scribbles to the paper, and not repeat its previous look.


     So, just as a recap, $2.50 is never as easy as it sounds.


       Happy Monday!

Romans 13:10 Love worketh no ill to his neighbour: therefore love is the fulfilling of the law.

Linking to:


Thursday, January 19, 2012

My mantle update

       I don't usually decorate for Valentine's Day, so I go for a "cozy" look that caries me through from after Christmas until Spring. I adore Christmas decorations, but I really enjoy how clean and uncluttered the house feels after I take them down. I like to leave things that way for a bit, so my decorating is very minimal January through March or so.


        My sister gave me this lovely picture for Christmas, and it perfectly fit the warm look I wanted.


      I just borrowed random items from the rest of my house that seemed to go. It does work to my advantage to have the whole house basically the same style and color scheme. I can rearrange to my hearts content without having to go to any extra trouble.


        So, in other news, I have a new photo editing program, Gimp. I normally use Picasa to edit my pictures, but I decided to try something different. (They are both free downloads) I'm no good with pictures, and even worse with computer editing. I appreciate a good picture though, and want to improve mine as much as possible. I'm trying to learn my camera better, and practice good staging, natural light, and all that jazz. That was one of my goals for this year...I suppose I better get cracking! I'm sure I'll be old and toothless before I figure out the art of a good picture! Have you started on any of your oh so fun goals for the new year?

  Ephesians 6:10   ... be strong in the Lord, and in the power of his might.

Wednesday, January 18, 2012

Sewing Shift Dresses


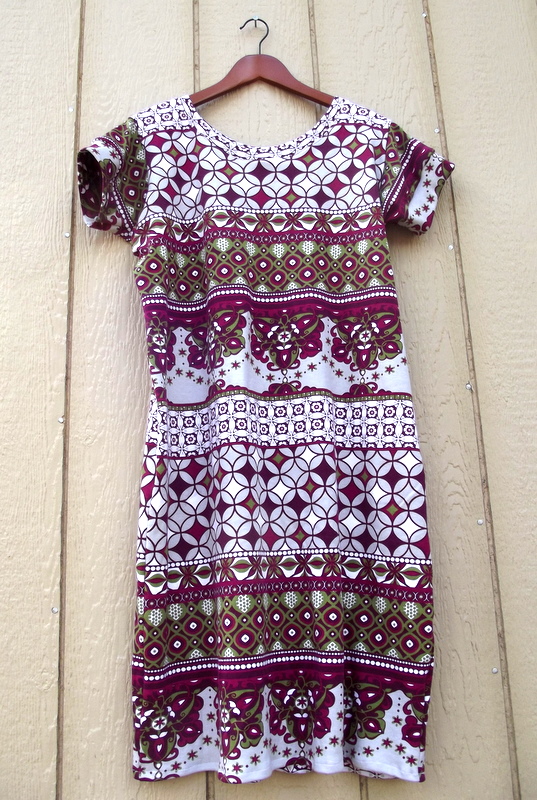
      This is my one of my favorite dress styles. It is just so comfy and can be dressed up or down so easily. I always make it with a stretchy type fabric so that it can just be pulled on, and so its simple to sew. This one is made from a double knit. This is a pretty long post, but it really isn't hard. I just took a lot of pictures, to make it as clear as possible. I always sew without a pattern, so these directions can apply to anyone if you know your measurements. All you need to know is the measurement of your widest point, how long you want the dress to be, how long you want the sleeves, and how wide your arm is at the length you want the sleeve.
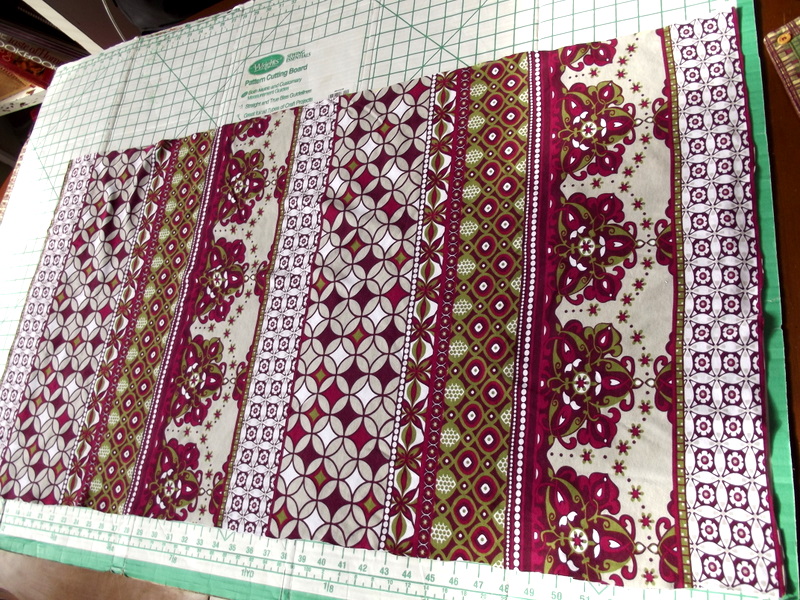
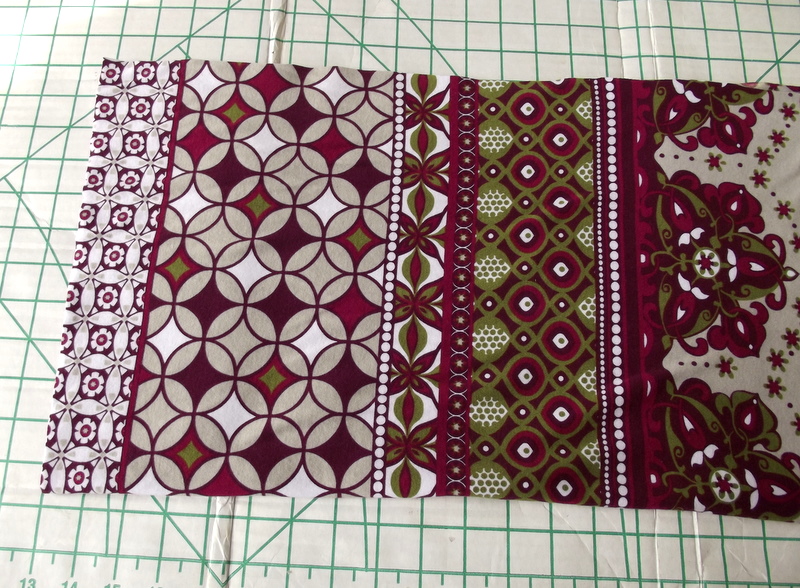
      Start by cutting your fabric as long as you need it, and as wide plus 2inches. You want the stretch of the fabric to be going width wise.

     Now fold it in half, so it is four layers thick with a fold down the side.

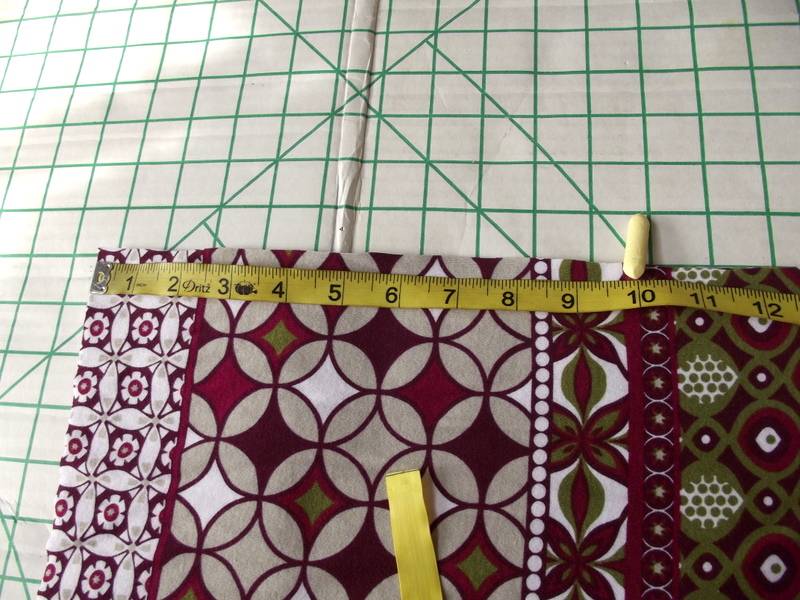
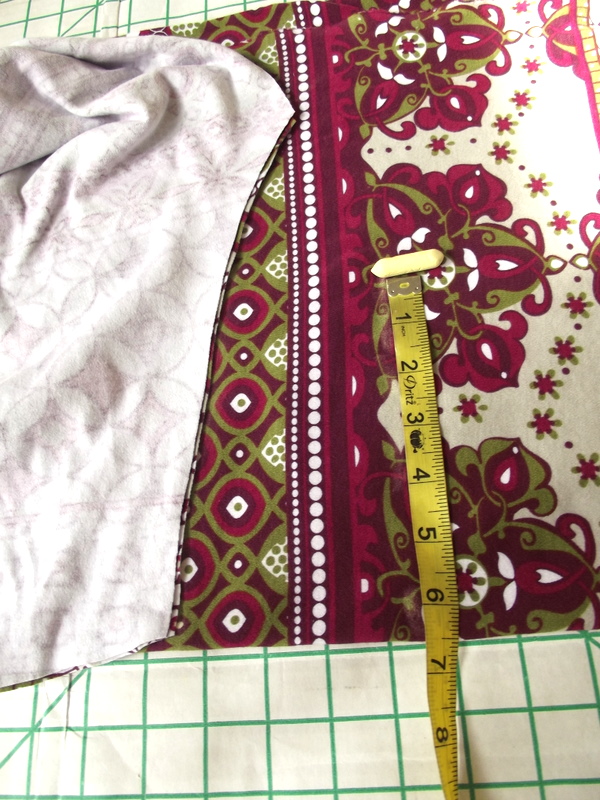
      Now measure down the side (NOT the folded edge) 10 inches and mark it. If you want a more fitted sleeve do 8 or 9 inches.

       Measure across the top 3 1/2 inches and mark it.

      Cut that section out, curving the line between points. This is the arm hole.

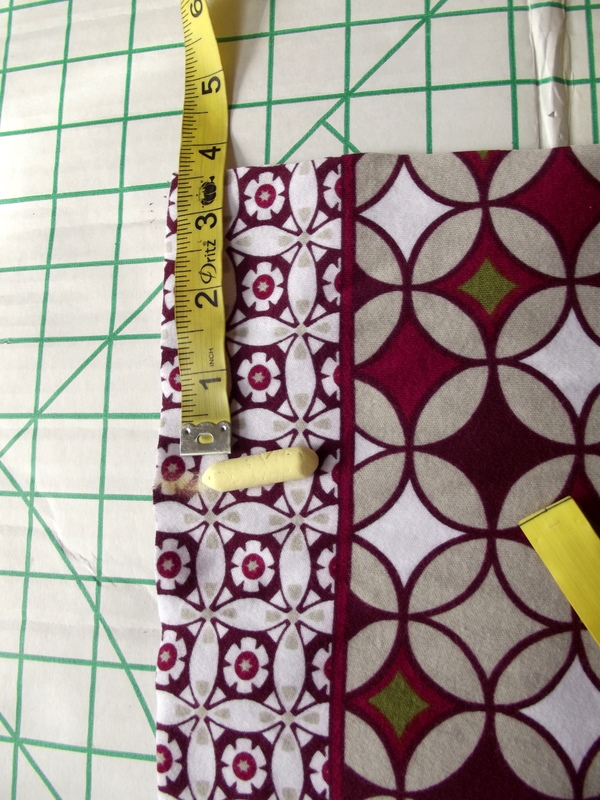
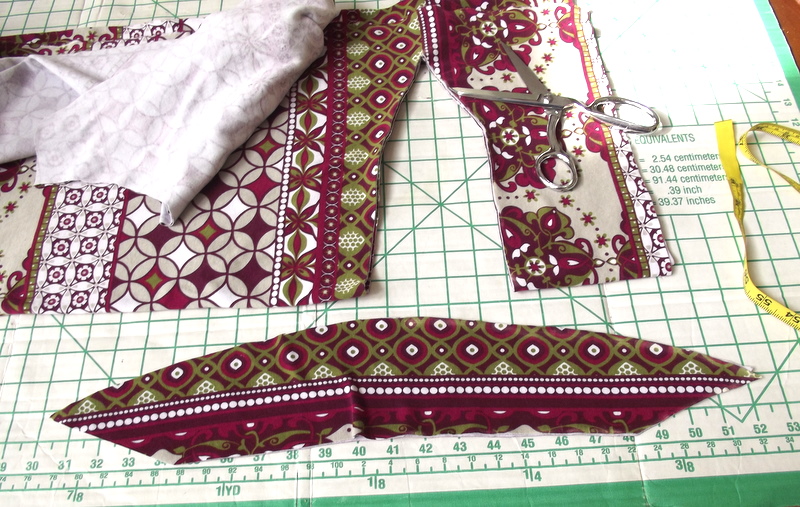
       Now measure across the top 3 inches and mark.

     Measure down the fold 4 inches and mark.


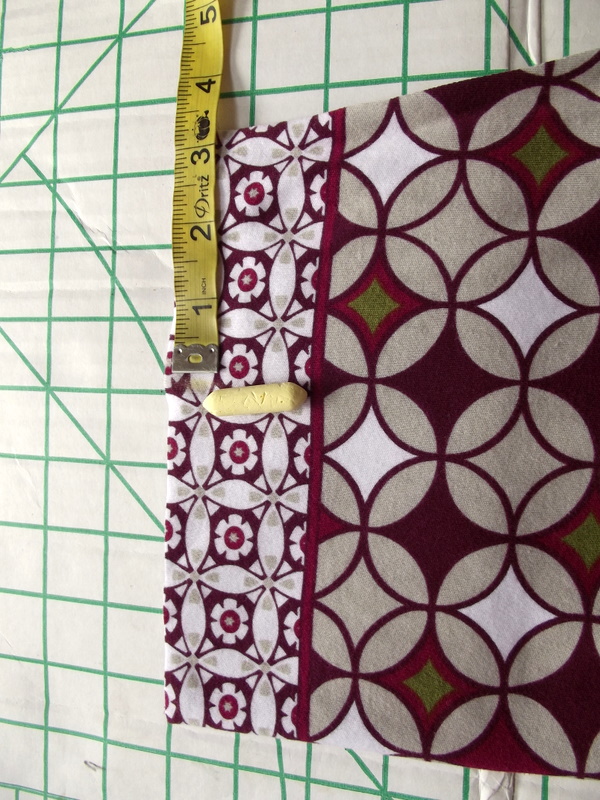
        Cut this out, making the line between points a curve.


       This is the neck of the dress. You will want the front to be lower than the back, so cut one layer a little lower.


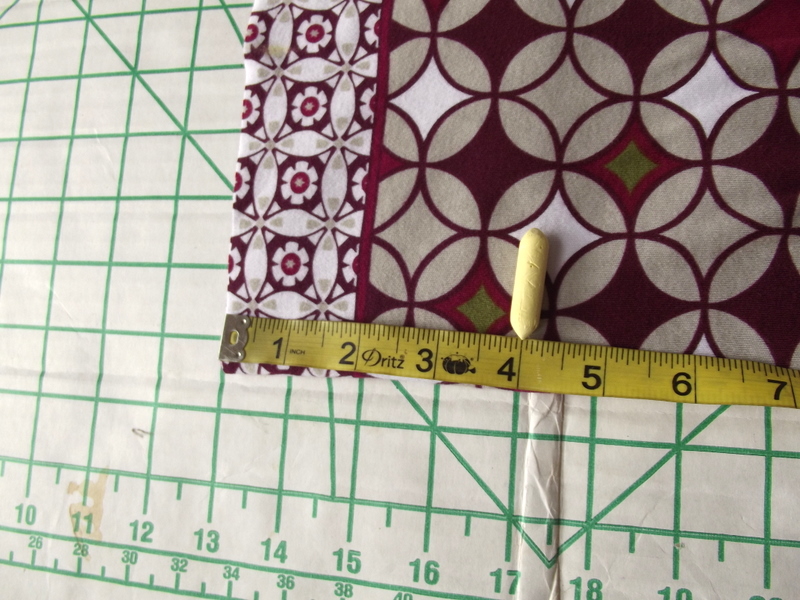
      I also cut a small wedge shape from off the shoulders. Your shoulders do not go straight across, they slope down. You want the dress to follow the shape of your body as much as possible.

       You can leave it sleeveless or add sleeves. To add sleeves, lay the cut out arm hole on the fold.(fabric should still be folded in fourths.) Stretch out the arm hole so it is a gentle curve and trace it onto the fabric.

       I wanted a short, almost cap sleeve, so I measured over 4 inches. To do a longer sleeve just decide how long you want it and measure over that far.

     I wanted the sleeve to be 12 inches around, so measured up 6 1/2 inches. (the half inch is added in because you will loose some width when sewing)


      Now, cut the sleeve out.


      When you open the sleeves up flat, they should be smoothly curved at the top. You don't want any sharp corners except at the edge.


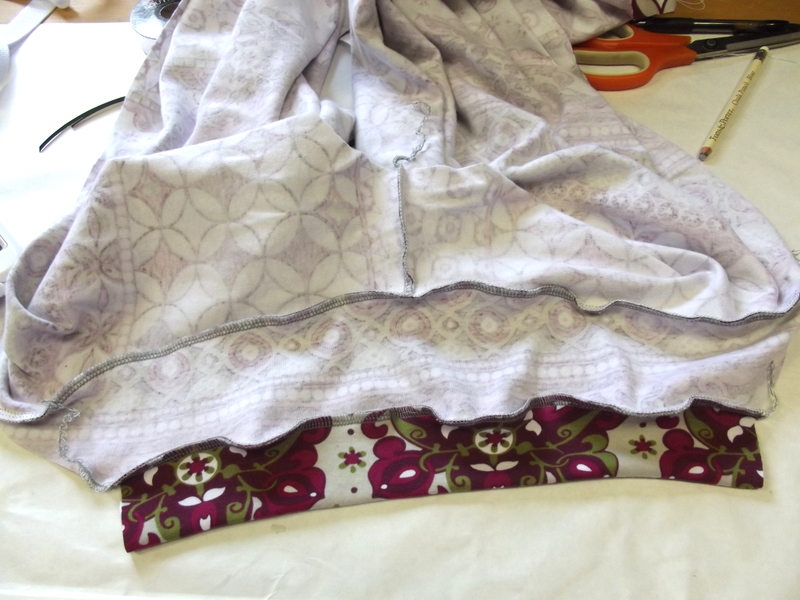
      Lastly, you need to cut out binding for your sleeve and neckline. You can also just hem them, and not sew on binding. I cut my sleeve binding slightly shorter than the bottom of the sleeve, and twice as wide as I want then result to be. Mine is 6 inches by 4 inches.


       I cut out the neck binding by first measuring the neck of the dress, one side at a time. Stretch out the neck until it is mostly straight and measure. Add the measurements of the front of the dress and the back of the dress. I subtract about 6 inches from that result. If the fabric you are using is very stretchy, you may need to subtract more. You want the neck binding to be shorter than the neckline to draw the neckline in, not longer or it will stretch it out so it is floppy. I cut my binding 2 inches wide, because I wanted the end result to be 1 inch wide.


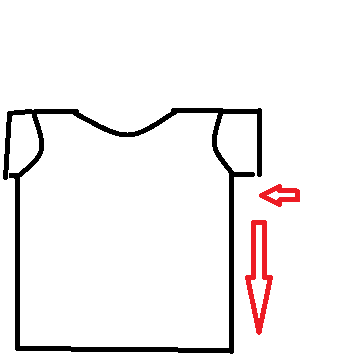
        Now we get to do the fun part, sew it together! Put the dress wrong sides together and sew the shoulders together first. Then sew the sleeves in like is pictured here.


       I find that it is easiest to sew the sleeve binding on at this point. Fold the binding in half and sew to the edge. It should look like this.


       Now sew down the side of your dress, like so.

      Sew your neck binding just as you did the cuff and hem the bottom of your dress. I like to top stitch around the neckline. I pat it with a hot iron and it helps it lie nice tidy.


      I know this looks dreadfully long, but honestly, you can make one in under two hours. Once you do it, you'll be able to turn out a whole closet full in no time if you wanted. Using this method you can change up the style a bit and achieve whatever look you wish. This is how I made this one as well.


        Sleeveless ones are incredibly fast and easy. I wear them all summer long and love them. If you give it a go, I'd love to see! =)

Philippians 1:6 Being confident of this very thing, that he which hath begun a good work in you will perform it until the day of Jesus Christ:

Linking to: